

Key takeaways
- Calculate the area. Multiply wall width by height, subtract only large openings, and add 10% to 15% for cuts and pattern matching. For example, a 9-foot-wide by 18-inch-high backsplash is 13.5 square feet. Adding 12% waste requires about 15.1 square feet of material.
- Make the wall sound. Remove grease, loose paint, wallpaper, and dust. Fill holes and sand glossy paint. Adhesive bonds to a clean, stable surface, not to cooking residue.
- Plan the layout dry. Center the pattern where it will be most visible and avoid ending with a very narrow strip at a corner. Mark a level starting line because countertops are not always perfectly level.
- Cut carefully. Thin sheets can often be scored with a sharp utility knife. Thicker PVC generally cuts more cleanly with a fine-tooth saw or suitable power-tool blade. Wear eye protection and support the panel to prevent cracking.
- Install from the reference line. For peel-and-stick material, expose only part of the backing first, align the sheet, then gradually press outward with a laminate roller. For interlocking panels, engage the joint without forcing it; a distorted tongue can create a visible gap in every following row.
- Seal vulnerable edges. Use the sealant specified by the manufacturer around the countertop, corners, and areas exposed to frequent splashing. Do not block required ventilation or cover electrical access improperly.
- Wait before heavy cleaning. Allow adhesive and sealant to cure for the stated period, commonly 24 to 72 hours, before repeated washing or exposing the backsplash to steam.
Best Faux Brick Backsplash Panels for Kitchen
The best faux brick backsplash panels for kitchen use are rigid PVC interlocking panels for areas near a cooktop, while peel-and-stick faux-brick sheets are the better choice for a low-cost, quick cosmetic update away from direct heat.
The right material depends less on whether the brick looks realistic and more on four practical questions: how much heat the wall receives, how flat the wall is, whether you need removable installation, and how often the backsplash will be cleaned. PVC panels usually offer better dimensional stability and more convincing mortar joints. Peel-and-stick panels cost less and install faster, but their adhesive and soft surface are the parts most likely to fail.
Our top picks

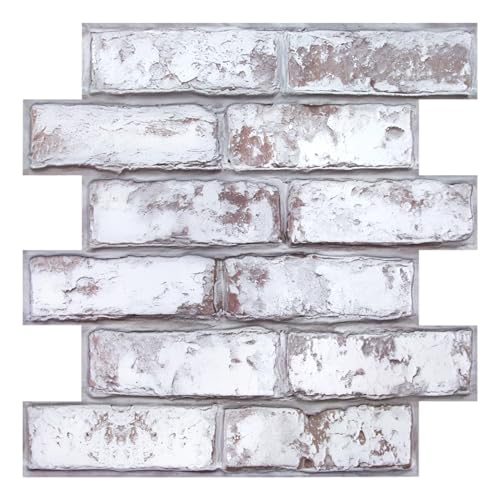
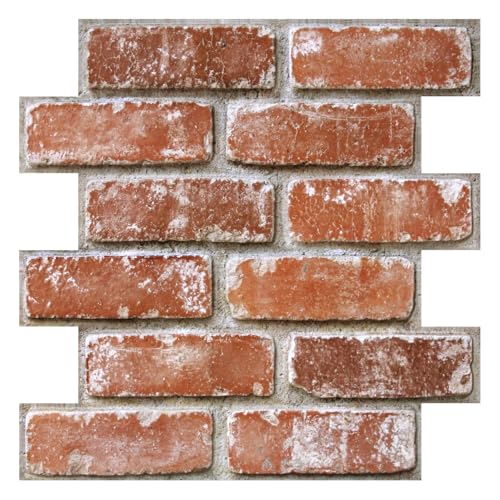

As an Amazon Associate we earn from qualifying purchases at no extra cost to you. Ratings are shown as listed on Amazon.
Quick comparison: PVC versus peel-and-stick faux brick
| Feature | Rigid PVC faux brick | Faux-brick peel-and-stick |
|---|---|---|
| Typical panel or sheet size | About 24 x 36 inches to 24 x 48 inches | About 10 x 10 inches to 28 x 39 inches |
| Typical thickness | About 0.20 to 0.40 inch | About 0.08 to 0.16 inch |
| Approximate weight | 1.5 to 3.5 lb per panel | 0.3 to 1.5 lb per sheet |
| Common construction | Embossed or molded PVC with colored surface finish | Vinyl, PVC foam, polyurethane foam, or composite adhesive sheet |
| Installation | Construction adhesive, screws, trim, or interlocking edges | Peel backing and press onto a prepared surface |
| Heat suitability | Often suitable for normal backsplash conditions, but verify the maker’s limit | Best away from direct burner heat; adhesive can soften or release |
| Cleaning | Usually tolerates damp wiping and mild detergent | Requires gentle wiping; seams and printed surfaces can lift or fade |
| Typical material cost | Approximately $8 to $18 per square foot | Approximately $4 to $12 per square foot |
These are market ranges rather than specifications for every product. A product’s technical data sheet takes priority, particularly for temperature limits, flame performance, and approved adhesive.
Best choices by kitchen situation
| Your situation | Better choice | Why |
|---|---|---|
| Lowest initial cost | Peel-and-stick sheet | Less material, trim, and installation equipment |
| Wall behind or beside a frequently used range | Rigid PVC panel with a verified heat rating | More stable surface and fewer adhesive-dependent seams |
| First-time DIY installation | Small peel-and-stick sheets | Easy to cut and reposition before final pressure is applied |
| Uneven painted drywall | Rigid panel over a leveled backing surface | Thicker material hides minor variation better |
| Rental or temporary makeover | Removable peel-and-stick product, if the manufacturer permits removal | Less permanent than adhesive-mounted panels, though paint damage is still possible |
| Large backsplash with few interruptions | Interlocking PVC panel | Fewer visible joints and faster coverage |
| Small area between counter and upper cabinets | Peel-and-stick sheet or narrow PVC panel | Less cutting and easier alignment around outlets |
Why thickness matters more than the brick print
Thin peel-and-stick sheets are forgiving around outlets and corners, but they can telegraph every defect underneath. A ridge in drywall, an old tile edge, or a screw head may remain visible after installation. Thin sheets also tend to show curling at exposed corners if the wall was dusty or the sheet was not firmly rolled down.
A panel around 0.20 inch thick or more provides a stronger visual shadow at the mortar lines and is less likely to buckle over small imperfections. The trade-off is that it may require deeper outlet extenders, longer screws, or edge trim. Measure the finished wall thickness around electrical boxes before ordering; a backsplash that projects substantially beyond the surrounding wall can make outlet plates sit recessed.
For realistic appearance, inspect the pattern repeat. A panel with the same three or four bricks repeated across every section can look artificial. Look for staggered courses, varied brick color, and mortar joints that have enough depth to catch light. Dark, heavily textured products may hide grease better, but white or pale mortar often shows splashes more clearly.
Heat resistance: the most important safety check
Do not assume that “water-resistant,” “easy-clean,” or “kitchen-ready” means heat-resistant. Those descriptions address moisture and cleaning, not the temperature produced by cookware. A backsplash directly behind a gas flame, toaster oven, air fryer, or high-output induction unit may experience much more heat than a wall beside the range.
Check the product’s stated maximum service temperature and required clearance from burners. If no temperature information is provided, treat the material as decorative and install it only in a low-heat area. Keep combustible foam-backed products away from direct flame and from any appliance exhaust that directs hot air at the wall. Where local building rules require a noncombustible surface behind a cooking appliance, a faux panel may not be an acceptable substitute for tile, metal, masonry, or another approved material.
PVC can soften, discolor, or warp when overheated. Peel-and-stick products have an additional weak point: the adhesive. Repeated heating and cooling can cause the edges to release even when the decorative face still looks intact.
Interlocking installation: why it can outperform adhesive-only sheets
Interlocking PVC panels use tongue-and-groove, overlap, or puzzle-style edges to reduce the chance of an open vertical seam. The joint also helps keep adjacent panels aligned. This is useful on a long backsplash where small errors accumulate across multiple sheets.
Installation steps
- Calculate the area. Multiply wall width by height, subtract only large openings, and add 10% to 15% for cuts and pattern matching. For example, a 9-foot-wide by 18-inch-high backsplash is 13.5 square feet. Adding 12% waste requires about 15.1 square feet of material.
- Make the wall sound. Remove grease, loose paint, wallpaper, and dust. Fill holes and sand glossy paint. Adhesive bonds to a clean, stable surface, not to cooking residue.
- Plan the layout dry. Center the pattern where it will be most visible and avoid ending with a very narrow strip at a corner. Mark a level starting line because countertops are not always perfectly level.
- Cut carefully. Thin sheets can often be scored with a sharp utility knife. Thicker PVC generally cuts more cleanly with a fine-tooth saw or suitable power-tool blade. Wear eye protection and support the panel to prevent cracking.
- Install from the reference line. For peel-and-stick material, expose only part of the backing first, align the sheet, then gradually press outward with a laminate roller. For interlocking panels, engage the joint without forcing it; a distorted tongue can create a visible gap in every following row.
- Seal vulnerable edges. Use the sealant specified by the manufacturer around the countertop, corners, and areas exposed to frequent splashing. Do not block required ventilation or cover electrical access improperly.
- Wait before heavy cleaning. Allow adhesive and sealant to cure for the stated period, commonly 24 to 72 hours, before repeated washing or exposing the backsplash to steam.
Ownership realities: what usually wears first
On peel-and-stick products, the corners and seams usually fail before the center of the sheet. Heat, steam, and an unclean wall accelerate this process. On PVC panels, the finish around the sink and range may lose its sheen first, while raised texture can trap oil if it is too deep to wipe easily.
Clean with a soft cloth, warm water, and a small amount of mild dish detergent. Avoid abrasive pads, solvent-based cleaners, and aggressive scraping, which can dull the printed surface or remove a faux mortar finish. Wipe grease promptly rather than allowing repeated layers to harden in the texture.
Common installation mistakes include applying sheets over textured walls, stretching flexible material while positioning it, aligning by the countertop instead of a level reference line, and placing an adhesive-backed panel too close to direct heat. Buying one extra sheet from the same production batch is also sensible because color and pattern can vary between batches.
Bottom line
Choose rigid interlocking PVC when durability, cleaner seams, thicker relief, and a more permanent installation matter most. Choose faux-brick peel-and-stick when the project is small, budget-sensitive, removable, and located away from direct heat. Whichever style you select, the manufacturer’s temperature rating, wall preparation requirements, and clearance instructions matter more than the brick pattern shown in the product photograph.

Write Your Review
No reviews yet. Be the first to share your experience!