

Key takeaways
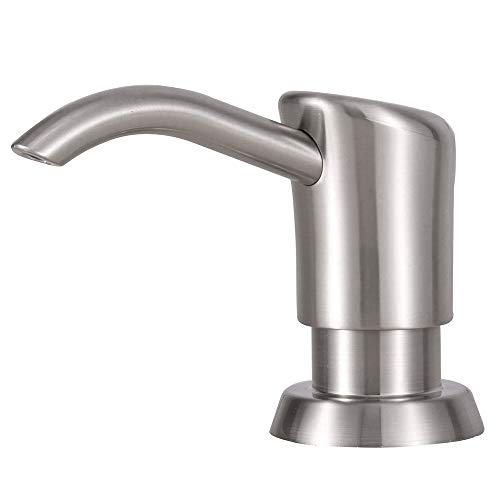
- 304 stainless steel: The strongest general-purpose choice for a visible pump head and spring housing. It resists surface corrosion from water, soap residue, and kitchen humidity. Look for the material designation rather than simply “stainless finish.”
- Brass: Common in better-built dispensers and typically rigid at the threaded connection. A plated brass pump can still suffer if its plating is damaged, so inspect the finish around the nozzle and threads.
- Plastic: Light, inexpensive, and often perfectly serviceable inside the bottle or tube. Plastic is less desirable for the exposed pump mechanism if the dispenser will receive heavy daily use.
- Zinc alloy or plated metal: Attractive but variable. The finish may eventually blister or pit around standing water, particularly with aggressive cleaners or salty water.
The best built in soap dispensers for kitchen sink installations are top-refill, stainless-steel or brass-pump models with a 10–16 oz bottle, a standard 1- to 1 3/8-inch mounting shank, and enough clearance beneath the sink for the reservoir.
Our top picks



As an Amazon Associate we earn from qualifying purchases at no extra cost to you. Ratings are shown as listed on Amazon.
Best Built-In Soap Dispensers by Situation
| Best for | Recommended dispenser type | What to look for | Typical market range |
|---|---|---|---|
| Frequent cooking and large households | Top-refill dispenser with 16 oz or larger bottle | Brass or stainless pump, wide refill opening, replaceable bottle | $25–$60 |
| Budget installation | Plastic-bottle dispenser with metal-look pump head | Standard mounting hole, check-valve or anti-drip nozzle | $12–$25 |
| Hard-water or coastal environments | 304 stainless-steel pump assembly | Corrosion-resistant spring and threaded fittings | $30–$70 |
| Little space under the sink | Compact 8–10 oz reservoir or hose-fed dispenser | Reservoir height under 7 inches; side clearance for removal | $20–$50 |
| Pre-drilled sink with no spare hole | Replacement dispenser matching the existing hole | Mounting shank between 1 and 1 3/8 inches, cover plate if needed | $20–$60 |
What Makes a Built-In Soap Dispenser Worth Buying?
A built-in dispenser is more than a decorative pump. The parts that determine ownership are the pump spring, the threaded mounting shank, the bottle connection, and the refill method. A low-cost dispenser can work well if its bottle and pump are easy to replace; an expensive-looking model can become frustrating when its narrow tube clogs or its reservoir cannot be removed.
For most kitchens, choose a model with a 10–16 oz capacity. A household using approximately 1 teaspoon per dishwashing session and five sessions per day would use about 25 teaspoons weekly. Since 48 teaspoons equal 8 fluid ounces, an 8 oz reservoir would last roughly 2–3 weeks, while a 16 oz reservoir would last approximately 4–6 weeks. Actual usage varies considerably, especially when the pump dispenses more than 1 teaspoon per stroke.
Pump material: stainless steel, brass, or plastic?
- 304 stainless steel: The strongest general-purpose choice for a visible pump head and spring housing. It resists surface corrosion from water, soap residue, and kitchen humidity. Look for the material designation rather than simply “stainless finish.”
- Brass: Common in better-built dispensers and typically rigid at the threaded connection. A plated brass pump can still suffer if its plating is damaged, so inspect the finish around the nozzle and threads.
- Plastic: Light, inexpensive, and often perfectly serviceable inside the bottle or tube. Plastic is less desirable for the exposed pump mechanism if the dispenser will receive heavy daily use.
- Zinc alloy or plated metal: Attractive but variable. The finish may eventually blister or pit around standing water, particularly with aggressive cleaners or salty water.
Rust resistance depends on more than the pump cap. The spring, internal shaft, washer, retaining nut, and bottle connector may be made from different materials. If a listing only identifies the visible cap as stainless steel, treat the internal hardware as unknown.
Top Refill Versus Under-Sink Refill
Top-refill dispensers
Top-refill designs let you lift off or unscrew the pump head and pour soap directly into the bottle from above. They are the easiest option for routine ownership because you do not need to kneel under the sink, disconnect a bottle, or work around plumbing.
Choose top refill when the dispenser will be used daily, the cabinet is crowded, or more than one person will maintain the kitchen. The main limitation is that the pump head and opening must be wide enough to prevent spills. A narrow opening can make thick dish soap difficult to pour without a funnel.
Under-sink refill bottles
Under-sink bottles usually attach to the underside of the pump with a threaded connection or flexible tube. They can hold more soap and leave the counter area visually cleaner, but refilling takes longer and requires access to the cabinet.
They are useful when you want a large 16–24 oz reservoir or have a dispenser positioned beside a faucet where the pump head has limited clearance. Check that the bottle can be unscrewed without hitting the sink bowl, garbage disposal, water filter, or supply lines.
Fit: Single-Hole and Pre-Drilled Sink Installations
Most built-in soap dispensers are designed for a spare faucet hole rather than the faucet’s primary opening. Measure the hole before buying. Common mounting openings are approximately 1 to 1 3/8 inches, but some sinks use a smaller or larger cutout.
- Single-hole sink with the faucet already installed: A dispenser requires a separate accessory hole. Do not assume the faucet hole can accept both components.
- Pre-drilled sink with a cap or blank plate: Remove the cap and measure the actual opening, including whether the sink has a recessed ledge.
- Sink with an unused faucet hole: Confirm that the dispenser’s shank is long enough to pass through the sink deck, gasket, and mounting hardware. A shank of roughly 2 inches or more is usually easier to fit on thick countertops.
- Granite, quartz, or solid-surface counter: Use an existing hole whenever possible. Drilling a new hole should be done with the correct diamond tooling and adequate clearance from the sink edge.
- Thin stainless-steel sink: A broad stabilizing washer helps prevent the dispenser from rocking when the pump is pressed.
Measure the vertical space beneath the mounting hole as well as the hole diameter. A 16 oz bottle may be about 7–9 inches tall, and the pump assembly can require another 2–3 inches above the bottle. Leave room to remove the bottle without disconnecting the drain or water lines.
Decision Matrix: Which Dispenser Fits Your Kitchen?
| Your situation | Best choice | Reason |
|---|---|---|
| First installation and limited plumbing experience | Top-refill, threaded-bottle model | Fewer under-sink connections and simpler troubleshooting |
| Very frequent hand and dishwashing | 16 oz top-refill model with metal pump | Fewer refills and better resistance to repeated pressing |
| Small cabinet with a disposal or filtration system | 8–10 oz compact bottle | Less vertical and lateral interference |
| Existing hole is larger than the dispenser shank | Model supplied with a stabilizing escutcheon or adapter | Prevents wobbling and hides the oversized opening |
| Very thick soap or concentrated detergent | Wide-bore pump with removable tube | Less clogging and easier flushing |
Notable Product Types and Brand Options
Moen’s built-in soap dispensers, including the Moen 3944 series, are widely used as faucet accessories and are a sensible choice when matching a Moen faucet finish matters. Delta replacement soap dispensers, such as the RP1001 family, are another practical option for kitchens already using compatible Delta hardware. Kohler’s built-in dispensers, including models in the K-1893 range, are worth considering when the sink or faucet uses a Kohler finish and the mounting dimensions match.
These branded choices are not automatically better than every generic dispenser. Their main advantages are finish coordination, replacement-part availability, and clearer compatibility information. Before purchasing, compare the hole diameter, shank length, reservoir dimensions, and refill method rather than relying on the brand name alone.
Installation and Maintenance That Prevent Problems
- Dry-fit every part first. Place the pump through the hole and hold the bottle below it. This reveals interference with the backsplash, sink bowl, or plumbing before sealant is involved.
- Install the gasket above the sink deck. The gasket should sit flat and clean. A twisted gasket is a common cause of water entering the cabinet.
- Tighten the retaining nut from below. Hold the pump straight while tightening by hand, then make only a small additional turn. Excessive force can crack a plastic shank or distort a thin sink deck.
- Flush the pump before filling it. Pump warm water through the tube to remove manufacturing dust and confirm that the mechanism moves freely.
- Use compatible soap. Very thick, gritty, or lotion-like products can clog a narrow pump. Dilution should follow the soap manufacturer’s instructions; adding water to the bottle can shorten its storage life.
- Clean the nozzle regularly. Wipe away dried soap and soak a removable pump tube in warm water. Do not use abrasive pads on plated finishes.
What Usually Wears Out First?
The pump spring and internal seal typically show problems before the bottle does. Symptoms include a pump that fails to return, air being dispensed instead of soap, or soap leaking around the shaft. The flexible pickup tube may also harden, split, or detach after repeated removal.
Keep the original bottle and pump dimensions if replacement parts are available. If not, replacing the complete dispenser is often simpler than adapting a mismatched tube. A dispenser that costs $30 and lasts five years costs about 1.6 cents per day, before soap; a $15 model lasting two years costs about 2.1 cents per day. The cheaper purchase is not always the cheaper ownership choice.
Final Buying Recommendation
For the broadest range of kitchens, choose a 304 stainless-steel or brass-pump dispenser with a 10–16 oz top-refill bottle, a replaceable pickup tube, and a mounting shank suited to a 1–1 3/8 inch pre-drilled hole. Select an under-sink reservoir only when capacity or counter appearance matters more than refill convenience. Most installation failures come from skipping measurements, overlooking cabinet clearance, or buying a dispenser whose mounting hardware does not match the existing hole.


Write Your Review
No reviews yet. Be the first to share your experience!