

Key takeaways
- High gloss: Makes metallic movement and marble veining look vivid, but shows fingerprints, dust, and fine scratches more readily.
- Satin: A practical compromise for a frequently used kitchen; it reduces reflections while retaining color depth.
- Matte: Better at disguising small marks, but may make dark colors appear flatter and can require a compatible protective topcoat.
- Stone effect: Uses layered base colors, pigments, and veining. It provides the most visual variation but requires more planning and a test board.
- Solid color: The simplest decorative route and easiest to repair, though uneven substrate preparation is more noticeable.
Best Epoxy Countertop Kit for Kitchen Makeover: What to Buy in 2026
The best epoxy countertop kit for kitchen makeover projects is a self-leveling, countertop-formulated system that covers at least 40 square feet, provides a 24-hour usable cure window, and includes a UV-resistant topcoat when the counter will receive strong sunlight or heavy daily use.
For most DIY kitchens, a two-part epoxy kit with a 1:1 mixing ratio is the easiest choice. Look for a kit that states its coverage at a specific thickness, provides a working time of at least 30 minutes, and separates decorative pigments from the clear flood coat. A kit that appears inexpensive but covers only 20 square feet can cost more than a larger kit once extra resin, primer, sealer, and tools are added.
Our top picks
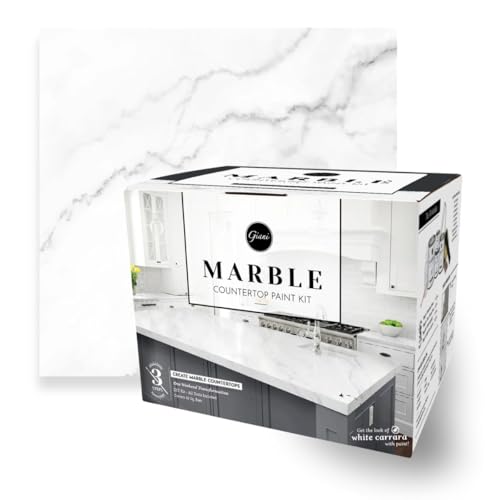


As an Amazon Associate we earn from qualifying purchases at no extra cost to you. Ratings are shown as listed on Amazon.
Quick Picks by Kitchen Situation
| Kitchen situation | Best kit type | Recommended coverage | Why it fits |
|---|---|---|---|
| Small vanity or short counter | Countertop epoxy starter kit | 20–30 sq. ft. | Lower upfront cost and less leftover material |
| Average kitchen, 35–50 sq. ft. | Complete decorative countertop system | 40–60 sq. ft. | Usually includes primer, pigments, epoxy, and topcoat |
| Large island or open-plan kitchen | Large-format kit or two matched kits | 60–100 sq. ft. | Reduces the risk of running out during a continuous pour |
| First epoxy project | 1:1, self-leveling system with instructional materials | 30–50 sq. ft. | More forgiving measuring and easier application |
| Busy kitchen with direct sunlight | Epoxy base plus UV-resistant polyurethane or urethane topcoat | 40–60 sq. ft. | Improves resistance to yellowing, abrasion, and daily wear |
How Much Epoxy Do You Actually Need?
Coverage figures depend on the pour depth. A countertop flood coat is commonly applied at approximately 1/8 inch, although the manufacturer’s instructions take priority. Measure each section separately, multiply length by width, and add the results.
For example, an island measuring 72 by 36 inches has:
72 × 36 ÷ 144 = 18 square feet
If the perimeter counter adds 28 square feet, the total surface is 46 square feet. Add 10% for waste, test pours, edges, and absorption into a porous substrate:
46 × 1.10 = 50.6 square feet
That project should use a kit rated for at least 55 square feet at the stated application thickness. Do not rely on a kit’s maximum coverage if you plan to coat exposed edges, create a thick waterfall edge, or apply a second clear coat.
Head-to-Head: Common Epoxy Kit Types
| Kit type | Typical coverage per kit | Working time | Touch-dry time | Full cure | Typical finish |
|---|---|---|---|---|---|
| Basic clear countertop epoxy | 20–40 sq. ft. | 25–45 minutes | 8–12 hours | 5–7 days | High gloss |
| Decorative stone-look system | 40–60 sq. ft. | 30–60 minutes | 8–24 hours | 5–7 days | Gloss, satin topcoat, or stone effect |
| Fast-cure countertop coating | 20–50 sq. ft. | 15–30 minutes | 4–8 hours | 2–4 days | Usually gloss |
| Epoxy with separate protective topcoat | 30–60 sq. ft. | 25–60 minutes | 8–24 hours | Base: 5–7 days; topcoat: 2–7 days | Gloss, satin, or matte |
These are useful planning ranges, not guarantees. Temperature, humidity, pigment load, mixing accuracy, and pour thickness can change cure times substantially. A “fast” product gives less time to correct bubbles, drips, or color mistakes, so it is not automatically the best choice for a beginner.
Recommended Product Categories and Established Brands
For a complete decorative makeover
Systems from brands such as Stone Coat Countertops are designed around decorative countertop transformations rather than clear resin casting. They commonly offer base coats, metallic or stone-effect pigments, epoxy layers, and protective finishes. This category is the strongest match when the goal is to imitate marble, granite, concrete, or a custom color rather than simply seal an existing surface.
For a clear, durable flood coat
Countertop Epoxy is another established countertop-focused brand offering clear and decorative epoxy systems. A clear flood coat works well over a properly prepared painted design, wood surface, or compatible laminate. Check whether the selected package includes primer and topcoat; some packages are resin-only and require additional purchases.
For smaller resin projects or edge details
Brands such as TotalBoat are well known for epoxy products, but not every epoxy in a broad product range is intended for kitchen countertops. A resin designed for casting, boat repair, or bonding may have different viscosity, UV behavior, heat performance, and food-contact instructions. Choose only a formulation whose technical documentation specifically supports countertop or coating use.
Heat, Scratches, and Everyday Durability
Epoxy countertops are water-resistant and visually tough, but they are not indestructible. Hot cookware is one of the most common causes of avoidable damage. Even when a manufacturer publishes a heat-resistance figure, that test may describe brief contact rather than a hot pan left in place. Use trivets for cookware, appliances that vent heat downward, and heated serving dishes.
Scratch resistance also depends on the protective topcoat. A thick glossy epoxy surface can resist ordinary spills and light abrasion, but grit under a cutting board, dragged appliances, and abrasive cleaners can dull it. Use flexible cutting boards, lift small appliances instead of sliding them, and clean with a soft cloth and non-abrasive dish soap.
The first visible wear often appears at sink cutouts, outside corners, cabinet overhangs, and frequently wiped areas. Seal exposed edges thoroughly, round sharp corners slightly where possible, and avoid leaving standing water around sink rims. A satin or matte urethane topcoat can hide fine scuffs better than a mirror-gloss finish, although it may be less dramatic visually.
Finish Options: Gloss, Satin, Matte, and Stone Effects
- High gloss: Makes metallic movement and marble veining look vivid, but shows fingerprints, dust, and fine scratches more readily.
- Satin: A practical compromise for a frequently used kitchen; it reduces reflections while retaining color depth.
- Matte: Better at disguising small marks, but may make dark colors appear flatter and can require a compatible protective topcoat.
- Stone effect: Uses layered base colors, pigments, and veining. It provides the most visual variation but requires more planning and a test board.
- Solid color: The simplest decorative route and easiest to repair, though uneven substrate preparation is more noticeable.
DIY Application: The Steps That Determine the Result
- Measure and inspect the surface. Confirm coverage, identify loose laminate, damaged particleboard, open seams, and areas around sinks that need repair.
- Remove contamination. Degrease thoroughly. Kitchen surfaces can retain oil and silicone residue that prevents primer adhesion.
- Sand and repair. Dull glossy surfaces, fill chips and seams, and remove dust. Epoxy can level minor texture but will not reliably hide deep dents or movement.
- Mask carefully. Cover cabinets, walls, floors, sink openings, and edges. Epoxy drips are difficult to remove after curing.
- Prime where required. Use the system’s compatible primer, especially on laminate, porous wood, or patched areas.
- Mix exact quantities. Measure resin and hardener according to the specified ratio. Scrape the container sides and bottom, then transfer and remix in a clean cup if instructed.
- Apply the base and design. Work in manageable sections. Create veins and color movement before the material begins to thicken.
- Pour the clear coat. Spread it to the recommended thickness and check edges for runs. A heat gun or torch may release bubbles, but excessive heat can scorch pigment or create ripples.
- Protect the cure. Keep dust, pets, and kitchen activity away for the complete cure period, not merely until the surface feels dry.
- Install hardware last. Tightening a faucet, appliance, or backsplash against partially cured epoxy can dent or crack the finish.
Common Buying Mistakes
Buying by container size instead of rated coverage is the most expensive mistake. Two kits with the same total weight may cover different areas because of formulation and recommended thickness. Other frequent errors include choosing a casting resin, skipping primer, tinting the resin so heavily that it fails to cure, and applying a second coat before the recoat window or after the surface has become too contaminated to bond.
Also budget for mixing cups, stir sticks, gloves, masking film, sanding materials, a compatible primer, and a topcoat if the kit does not include them. A practical total budget for a DIY kitchen countertop project is often about $250–$800, depending on surface area, decorative complexity, and whether tools are already available.
Final Buying Recommendation
Choose a complete 40–60-square-foot countertop system with a 1:1 mix ratio, at least 30 minutes of working time, clearly stated cure stages, and an optional satin or matte protective topcoat. For a high-use kitchen or a counter near a sunny window, prioritize the documented UV and abrasion performance of the topcoat over an unusually thick epoxy layer. For a first project, buy 10% more coverage than your measurement requires and make a small sample board before committing to the full counter.

Write Your Review
No reviews yet. Be the first to share your experience!